Is your child asking for a new toy? If yes then by following this sock monkey tutorial you can create a toy for your kiddo that is just adorable.

To make a sock monkey first draw pattern on both the socks. Mark the first sock as shown with black lines. Mark the second too. You have to sew along the black lines and cut along the dotted blue lines. Now take the first sock that has the head, body and legs and sew the portion of legs leaving a small part unstitched. Cut the arms, legs, ears and mouth.

Turn the sock with body and legs inside out from the hole. Fill with fiberfill.


Sew the hole in the first filled sock. Sew the pieces of tail, arms and ears and fill with fiberfill.

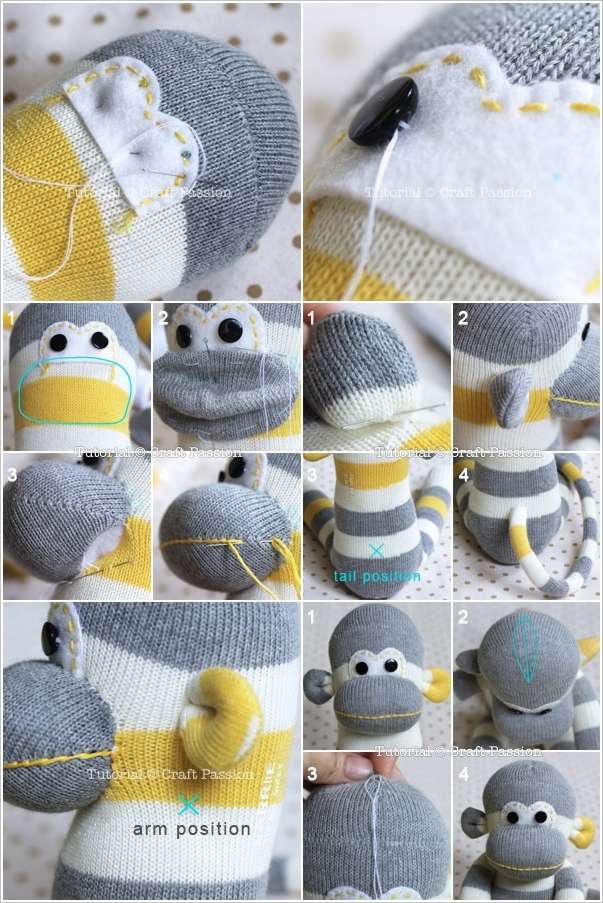
Sew a piece of white felt on the monkey’s head and sew buttons to make the eyes. Then sew the piece of mouth that you cut earlier from the second sock and fill that too. Attach the arms, ears and tail. Detail the monkey’s mouth and head with embroidery floss and voila!

Make as many as you like and surprise your kids. Hop over to craft passion for more details. Happy crafting!
